EV charger maintenance: checklist for owners and property managers
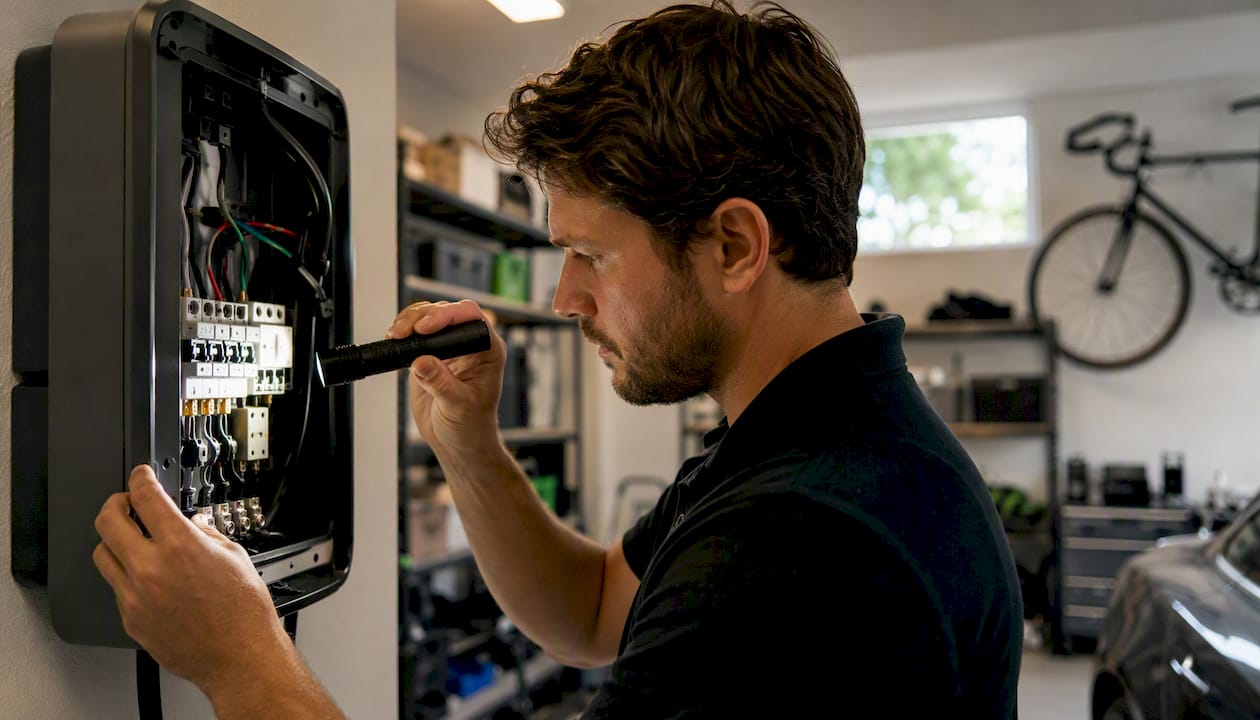
Do a quick visual and cable check every month, test your safety device once a year, and call a licensed electrician the moment you smell burning, feel heat near the unit, or notice repeated breaker trips. That three-part rhythm, backed by the Electrical Safety Authority and manufacturer guidance from ChargePoint and Schneider Electric, covers the vast majority of what keeps a home or commercial charger safe and reliable. A well-maintained Level 2 unit typically lasts 8–15 years; skip the basics and that window shrinks fast.
Your at-a-glance schedule:
- Monthly: Walk around the unit. Check the cable for cuts, kinks, or scorch marks. Confirm the connector pins are clean and the holster is secure. Verify the status light is normal.
- Quarterly: Wipe the enclosure with a damp lint-free cloth. Check the mounting bolts for looseness. Inspect the cable entry point and any weatherproof seals. For smart chargers, confirm the Wi-Fi or cellular link is active and firmware is current.
- Annual: Have a licensed electrician test the RCD/GFCI, verify earthing resistance, torque terminal connections, and inspect internal components. This is the visit that protects your warranty.
Pro Tip: Never wrap the cable tightly around the unit when storing it, and never use a pressure washer near the enclosure. Both are among the fastest ways to shorten a charger’s service life. Use a loose coil and keep water well away from any seals or vents.
Key takeaways
Consistent monthly checks, an annual professional inspection, and a clear rule about when to call a licensed electrician will keep most home and commercial EV chargers running safely for their full service life.
| Point | Details |
|---|---|
| Monthly visual check | Inspect the cable, connector pins, and status light every month to catch damage early. |
| Annual RCD test | Manually trip the safety device once a year; a failed trip means stop using the charger immediately. |
| Professional inspection cadence | Book a licensed electrician annually for earthing, insulation, and torque checks to preserve warranty coverage. |
| Know when to escalate | Burning smell, repeated breaker trips, or visible internal damage require a certified electrician, not a reset. |
| Evchargerinstallationtoronto | ESA-licensed installation with permits, rebates, and documentation handled, serving homeowners across the Greater Toronto Area. |
Table of Contents
- Does an EV charger need regular maintenance?
- Why EV charger maintenance matters more than most owners realise
- How often should you service your EV charger?
- EV charger maintenance checklist: what to check and how
- Common problems and how to troubleshoot them safely
- What a certified technician actually does during a service visit
- Who is responsible for EV charger maintenance?
- How much does EV charger maintenance cost?
- When to hire a licensed electrician for your EV charger
- Safety rules every EV charger owner should follow
- A note on what we actually see in the field
- Certified EV charger installation and maintenance in the GTA
- Sources
Does an EV charger need regular maintenance?
Yes, every charger does, though the effort is modest for most homeowners. The misconception that chargers are “set and forget” hardware comes from comparing them to simple wall outlets. They are not the same thing. A Level 2 charger operates at 240 volts and draws 32–48 amps continuously for hours at a time, which creates real thermal stress on internal contactors, connectors, and wiring terminations. That continuous high-current duty is one of the primary wear mechanisms documented in charger reliability research, and it is why scheduled checks matter even for units that appear to be working fine.
Outdoor units face an additional layer of stress. UV exposure degrades cable insulation and enclosure seals over time. Moisture ingress, even from condensation, can corrode connector pins and trigger nuisance trips or, worse, silent insulation breakdown. Indoor garage-mounted units avoid most of that, which is why their service intervals can be longer.
Indoor vs outdoor, and Level 1 vs Level 2 at a glance:
- Level 1 (120V, indoor): Lowest thermal stress, minimal environmental exposure. Lifespan commonly exceeds 10–12 years with basic care.
- Level 2 (240V, indoor): Higher throughput and thermal cycling. Typical lifespan runs 8–12 years depending on usage and panel quality.
- Level 2 (240V, outdoor): Same electrical stress as indoor, plus UV, moisture, and temperature swings. More frequent visual checks and earlier seal replacement are normal.
- Commercial multi-port stations: High daily session counts accelerate connector wear and contactor fatigue. Manufacturer-prescribed preventive maintenance intervals apply strictly here.
The good news is that for a single home charger, most of the routine work takes under ten minutes a month.
Why EV charger maintenance matters more than most owners realise
Safety is the primary reason, and it is not abstract. Loose terminal connections arc under load, and arcing generates heat that can ignite surrounding materials. A seized residual-current device (RCD) or ground-fault circuit interrupter (GFCI) looks functional but will not trip during an actual earth fault, leaving a person or property exposed. Moisture that enters through a cracked enclosure seal does not announce itself; it corrodes quietly until a component fails.
The ESA’s guidance on EV charging safety specifically flags the seized RCD as a common hidden hazard. A device that has never been manually tested may not trip when it needs to. That single annual test, which takes about thirty seconds, is one of the highest-value actions on this entire list.
Beyond safety, there are two practical reasons to stay on top of upkeep:
- Warranty preservation. ChargePoint’s operation and maintenance manual states that servicing by non-certified personnel can void the warranty. Schneider Electric’s EVlink preventive maintenance guide frames the same point as a risk-management practice. If a component fails and you cannot show a maintenance record, the manufacturer’s warranty claim may be denied.
- Uptime for shared stations. A charger that goes offline in a condo parking garage or workplace lot affects every driver who depends on it. Preventive maintenance on commercial stations, including the remote diagnostics that platforms like ChargeLab enable, reduces unplanned downtime by catching faults before they become failures.
Consequences of skipping maintenance:
- Arcing at loose terminals leading to heat damage or fire risk
- Seized RCD that fails to protect against earth faults
- Moisture ingress corroding pins and causing intermittent faults
- Voided manufacturer warranty on a unit that cost hundreds to thousands of dollars
- Unplanned downtime on shared or commercial stations
How often should you service your EV charger?
The recommended rhythm for a home charger is monthly visual checks, quarterly deeper inspections, and an annual professional safety inspection. That cadence works well for a single indoor or sheltered outdoor unit with one regular user. Increase the frequency when any of the following apply:
- The unit is fully exposed to weather year-round
- It serves multiple users or runs more than two sessions per day
- It is installed in a commercial, fleet, or multi-unit residential setting
- The charger is more than five years old
Triggers for an unscheduled professional visit (do not wait for the next annual):
- Burning smell at any time during or after charging
- The unit or cable feels warm to the touch after a session
- The breaker trips more than once in a short period
- Visible cracks, scorch marks, or water inside the enclosure
- The RCD fails to trip or reset during your annual manual test
ChargePoint’s manufacturer manual prescribes checks at installation, at one year, and again at five years for its commercial units, with monthly visual checks in between. Schneider Electric’s EVlink guide recommends annual preventive visits by qualified personnel as the minimum for standard maintenance. For outdoor commercial stations running high session volumes, quarterly professional checks are reasonable.
EV charger maintenance checklist: what to check and how
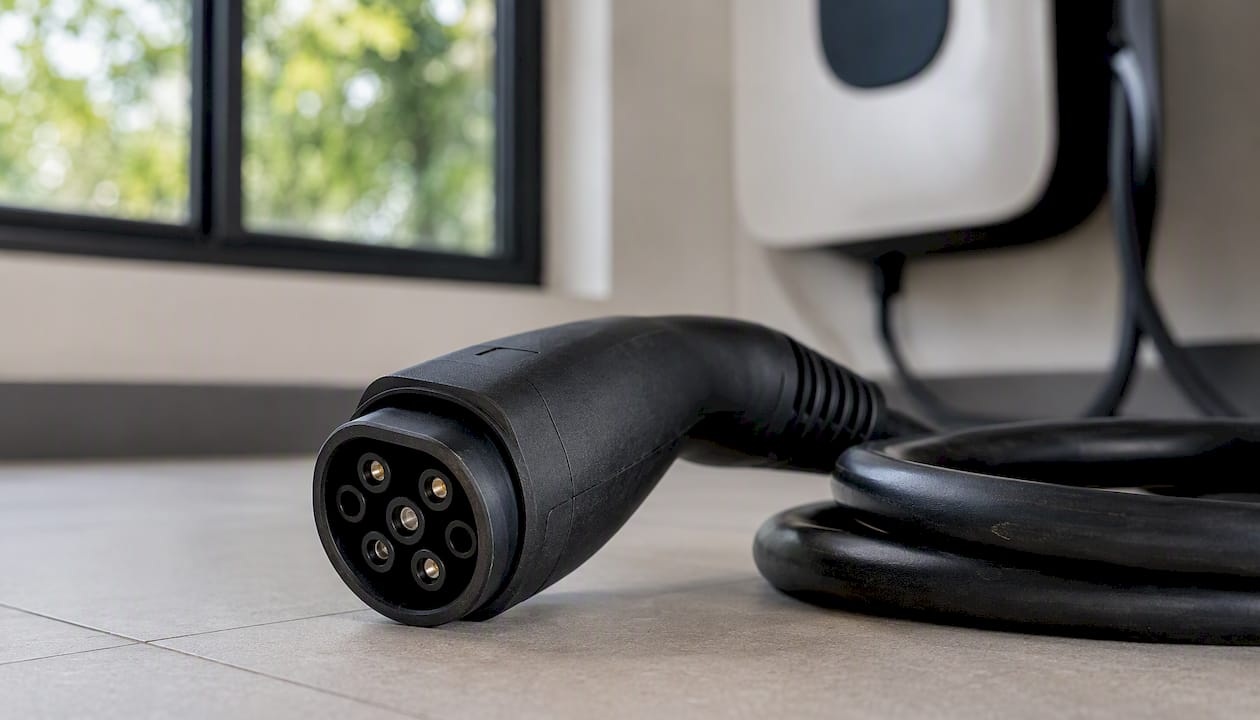
The most safety-critical checks are cable integrity, connector pin condition, enclosure seals, mounting security, status lights, and the RCD or GFCI. Everything else builds on those six.
| Task | How to check | Frequency | Who |
|---|---|---|---|
| Visual inspection of cable and connector | Look for cuts, kinks, scorch marks, or bent pins | Monthly | Homeowner |
| Connector pin cleaning | Wipe with dry lint-free cloth; no solvents | Monthly | Homeowner |
| Status light check | Confirm normal colour/pattern per manual | Monthly | Homeowner |
| Enclosure wipe-down | Damp lint-free cloth; avoid seals and vents | Quarterly | Homeowner |
| Mounting bolt check | Hand-check for looseness; tighten if needed | Quarterly | Homeowner |
| Cable entry and seal inspection | Look for cracks, gaps, or moisture staining | Quarterly | Homeowner |
| Firmware and connectivity check | Confirm app or network shows unit online; check for pending updates | Quarterly | Homeowner |
| RCD/GFCI manual trip test | Press test button; confirm trip and reset | Annual | Homeowner (escalate if it fails) |
| Earthing resistance measurement | Multimeter or clamp meter test | Annual | Licensed electrician |
| Terminal torque check | Torque screwdriver to manufacturer spec | Annual | Licensed electrician |
| Insulation resistance test | Megohmmeter check on wiring | Annual | Licensed electrician |
| Internal visual inspection | Open enclosure per lockout/tagout; inspect for moisture, corrosion, burn marks | Annual | Licensed electrician |
| Contactor and relay check | Functional test under simulated load | Annual | Licensed electrician |
Tools and materials for homeowner checks:
- Dry and damp lint-free cloths
- Torch or headlamp for inspecting the connector cavity
- Torque screwdriver (for mounting bolts only, not internal terminals)
- PPE: safety glasses and insulated gloves when near the unit
Any task that requires opening the enclosure or touching internal wiring requires circuit isolation and lockout/tagout before work begins. That is not a homeowner task.
Pro Tip: Keep your smart charger connected to your home network at all times. Platforms like those supported by Wallbox and ChargePoint push firmware updates automatically when the unit is online, and some can alert you to faults before you would ever notice them yourself. Pair that with a surge protective device at the service panel to guard against voltage spikes that accelerate internal wear.
Common problems and how to troubleshoot them safely
Before trying anything, confirm the charger is not showing a fault code that your manual flags as “call a technician.” If it is, stop there.
Charger won’t start a session
- Check that the connector is fully seated; a partial connection is the most common cause.
- Confirm the vehicle is in park and the charging port is open.
- Check the app or display for an error code and look it up in the manual.
- Verify the circuit breaker has not tripped; reset it once only.
- If the breaker trips again immediately, stop and call a licensed electrician.
Charging stops mid-session
- Check whether the vehicle reached its programmed charge limit.
- Inspect the cable for heat; if it feels warm, unplug and stop using the charger.
- Check for a Wi-Fi dropout if the charger is networked; reconnect and retry.
- If the RCD has tripped, reset it once. A second trip means a fault is present.
Slower than expected charging speed
- Confirm the vehicle’s onboard charger limit matches the station’s output.
- Check for a scheduled charging or load-management setting in the app.
- Inspect the connector pins for dirt or corrosion; clean with a dry cloth.
- A shared circuit with other high-draw appliances can reduce available current.
Breaker trips repeatedly
This is the clearest sign to stop DIY troubleshooting. Repeated trips indicate an overload, a ground fault, or an internal component failure. Resetting a breaker that keeps tripping is not a fix; it is a way to mask a fault that could cause a fire.
Error codes and connectivity faults
- For OCPP-networked stations (common in commercial settings), check the backend dashboard first. ChargeLab and similar platforms surface fault codes remotely, which often lets a technician diagnose the issue without a site visit.
- A persistent offline status on a smart charger usually means a router or SIM issue, not a hardware fault. Reboot the router before assuming the unit is faulty.
Pro Tip: Never reset a tripped breaker more than once without understanding why it tripped. A breaker that trips twice in a row on the same circuit is telling you something is wrong. Repeated resets can damage the breaker itself and mask a wiring fault that needs a licensed electrician.
What a certified technician actually does during a service visit
A professional maintenance visit covers ground that no homeowner visual check can reach. Here is what to expect, and what to ask for on the service report.
The technician begins with site isolation and lockout/tagout: the circuit is de-energised and locked out before the enclosure opens. This is non-negotiable and is the procedure that manufacturer manuals, including ChargePoint’s, require before any internal work.
Once isolated, the visit typically includes:
- Earthing resistance test: A low-resistance measurement confirms the protective earth path is intact. A high reading means the unit is not safely earthed.
- Insulation resistance test: A megohmmeter check on the wiring identifies degraded insulation before it causes a fault.
- Terminal torque verification: Every busbar and terminal connection is checked against the manufacturer’s torque specification. Thermal cycling loosens connections over time, and a loose terminal is the most common cause of arcing.
- RCD/GFCI functional test: The device is tripped electrically and timed; a slow or failed trip means replacement.
- Firmware and communication check: For networked units, the technician confirms the OCPP connection, backend registration, and that the latest firmware is installed.
- Visual inspection for moisture and corrosion: With the enclosure open, the technician looks for water tracks, corrosion on the PCB, and any signs of thermal damage.
- Worn parts replacement: Cables, connectors, and contactors that show wear are replaced at this visit rather than at failure.
Servicing by non-certified personnel can void the manufacturer warranty on units from ChargePoint, Schneider Electric (EVlink), and Wallbox. Always ask for a written service report that lists every test performed and its result.
Who is responsible for EV charger maintenance?
For a home charger, the homeowner is responsible for routine visual checks and for scheduling the annual professional inspection. For a commercial or multi-unit residential site, the site operator or property manager carries a broader set of obligations.
Homeowner responsibilities:
- Monthly visual and connector checks
- Annual RCD test (and escalating to a licensed electrician if it fails)
- Scheduling and paying for the annual professional inspection
- Keeping a simple maintenance log (date, what was checked, any findings)
Site operator and property manager responsibilities:
- Written preventive maintenance programme with scheduled intervals
- Maintenance log for each unit, including commissioning documentation and single-line diagrams
- Proof of certified servicing for warranty and insurance purposes
- Access control to prevent tampering with the units
- Lockout/tagout procedures posted and followed for any service work
- Compliance with local electrical code and building rules; in Ontario, an ESA permit is required for new installations and for significant modifications
Record-keeping does not need to be elaborate. A dated log entry that names the technician, lists the tests performed, and notes any parts replaced is sufficient for most warranty and insurance purposes. For commercial sites, that log is also your evidence of due diligence if an incident ever occurs.
How much does EV charger maintenance cost?
A homeowner doing their own monthly and quarterly checks pays nothing beyond a lint-free cloth and ten minutes. The cost question really applies to the annual professional inspection and any corrective work that comes out of it.
Ballpark figures (vary by region and complexity):
- Annual home inspection: A licensed electrician’s visit for a single Level 2 unit typically runs in the range of a standard electrical service call, covering the earthing test, RCD test, and terminal check. Prices vary by market and travel distance.
- Commercial station servicing: Multi-port or DC fast-charging stations involve more tests, more terminals, and often a backend connectivity check. Expect a higher labour rate and longer visit time compared to a residential unit.
- Parts replacement: Cable assemblies and connector replacements are the most common corrective costs. Internal electronic components are less frequent but more expensive.
What drives the cost up:
- Outdoor or hard-to-access installations
- Older units requiring non-standard parts
- Panel upgrades needed to support the charger’s load (a 200A panel upgrade is a separate cost from maintenance)
- Firmware or software support for proprietary networked systems
- High-usage commercial sites requiring more frequent visits
Three habits that reduce long-term costs:
- Stay on the preventive schedule. A $150 annual inspection is far cheaper than a $600 corrective repair after a connector fails.
- Keep smart chargers online. Remote diagnostics catch faults early, sometimes before they cause damage.
- Install a surge protective device at the service panel. Voltage spikes are a documented cause of premature electronic failure, and a suppressor costs a fraction of a replacement unit.
When to hire a licensed electrician for your EV charger
Call a licensed electrician any time the issue involves internal wiring, repeated breaker trips, a failed RCD test, visible internal damage, or any work covered under the manufacturer warranty. Those are not judgment calls; they are hard lines.
Specific triggers that require a certified electrician:
- Burning smell or heat from the unit or cable at any time
- Breaker trips more than once on the same fault
- RCD fails to trip or fails to reset during the annual test
- Visible scorch marks, water inside the enclosure, or corroded terminals
- Any internal wiring work, terminal replacement, or component swap
- Warranty-covered repairs (non-certified work voids coverage on ChargePoint, EVlink, and Wallbox units)
What to ask for when hiring:
- ESA licence number (in Ontario) or the equivalent local credential
- Manufacturer certification where the unit requires it (ChargePoint and Schneider Electric both have certified technician programmes)
- A written service report listing every test, its result, and any parts replaced
- Updated single-line diagram if any wiring was modified
A certified technician does not just swap parts. They test the earthing path, verify the RCD response time, torque every terminal to spec, and confirm the firmware is current. That combination of tests is what the manufacturer’s warranty requires, and it is what separates a real maintenance visit from a visual check with a screwdriver.
Evchargerinstallationtoronto’s ESA-licensed electricians handle permit applications, rebate paperwork, and full inspection documentation as part of the service. Their live map and customer reviews show completed jobs across the Greater Toronto Area, which gives you a concrete way to verify their track record before booking.
Safety rules every EV charger owner should follow
Isolate power and call a licensed electrician immediately if you smell burning, see heat damage, or notice exposed wiring. That is the single rule that prevents the most serious outcomes.
Never do these things:
- Use an extension cord to reach the charger. Extension cords are not rated for sustained high-current EV charging loads and create a fire risk.
- Pressure-wash the unit or spray water directly at the enclosure, vents, or connector.
- Insert any object into the connector cavity other than the vehicle’s charging port.
- Reset a tripped breaker more than once without knowing why it tripped.
- Attempt to open the enclosure or touch internal components while the circuit is live.
- Ignore a fault code or warning light and continue charging.
Additional safety habits:
- Keep children away from the connector and cable during a charging session.
- Do not charge with a visibly damaged cable; unplug and stop until the cable is replaced.
- Check the connector for debris before plugging in, especially in outdoor or shared installations.
Pro Tip: Test your RCD or GFCI manually once a year by pressing the test button on the device. Per the ESA’s guidance, a seized RCD that looks intact may not trip during a real fault. If the button does not trip the device, or the device does not reset afterward, stop using the charger and call a licensed electrician that day.
A note on what we actually see in the field
Most owners who call with a charger problem have one of two things going on: a connector that has never been cleaned, or a breaker that has been reset so many times that the underlying fault has been masked for months. Both are preventable with a ten-minute monthly check and one firm rule about not resetting a tripped breaker twice.
The owners who never have problems are almost always the ones doing something simple: they glance at the cable before plugging in, they keep the unit online for automatic firmware updates, and they book the annual inspection without waiting for something to go wrong. That is not a complicated habit. It is just a consistent one.
Where we draw the line clearly: if the cable is warm after a session, if the breaker has tripped twice, or if the RCD test fails, that is a licensed electrician call, not a DIY fix. The equipment is operating at voltages and currents that cause serious injury when something goes wrong. The cost of a professional visit is a fraction of the cost of a replacement unit, and a fraction of the cost of what happens when a fault is ignored.
Certified EV charger installation and maintenance in the GTA
Keeping a charger in good shape starts with a proper installation. A unit installed without the right panel capacity, correct wiring gauge, or an ESA permit creates maintenance headaches from day one.
Evchargerinstallationtoronto’s ESA-licensed electricians handle every part of the process: permits, inspections, rebate applications worth up to $5,000, and a written record you can hand to any future technician. Installations are completed within a few hours, and the team’s 4.9-star rating across the Greater Toronto Area reflects the kind of work that does not come back as a problem six months later. Use the free cost calculator to get a transparent estimate for your home or condo, then book a same-week appointment to get started.
Sources
The following manufacturer documents and safety guides are worth bookmarking for model-specific intervals and warnings.
- ChargePoint Express Plus operation and maintenance (manufacturer service manual)
- EVlink AC charging stations preventive maintenance guide (Schneider Electric)
- Bolt
Recommended
- EV Charger Installation Cost Calculator Toronto | Free Estimate | EV Install Pro Toronto
- EV Charger Installation in a Toronto Condo or Apartment: The Complete 2025 Guide | EV Install Pro Toronto
- Condo & Apartment EV Charger Installation Toronto | Board Approval Included | EV Install Pro Toronto
- EVEMS Installation Toronto | Smart Load Management | Skip the Panel Upgrade | EV Install Pro Toronto
Get Your Free Installation Quote
Free assessment · ESA permit included · Same-week availability across the GTA