EV charger placement for Canadian homeowners: quick guide
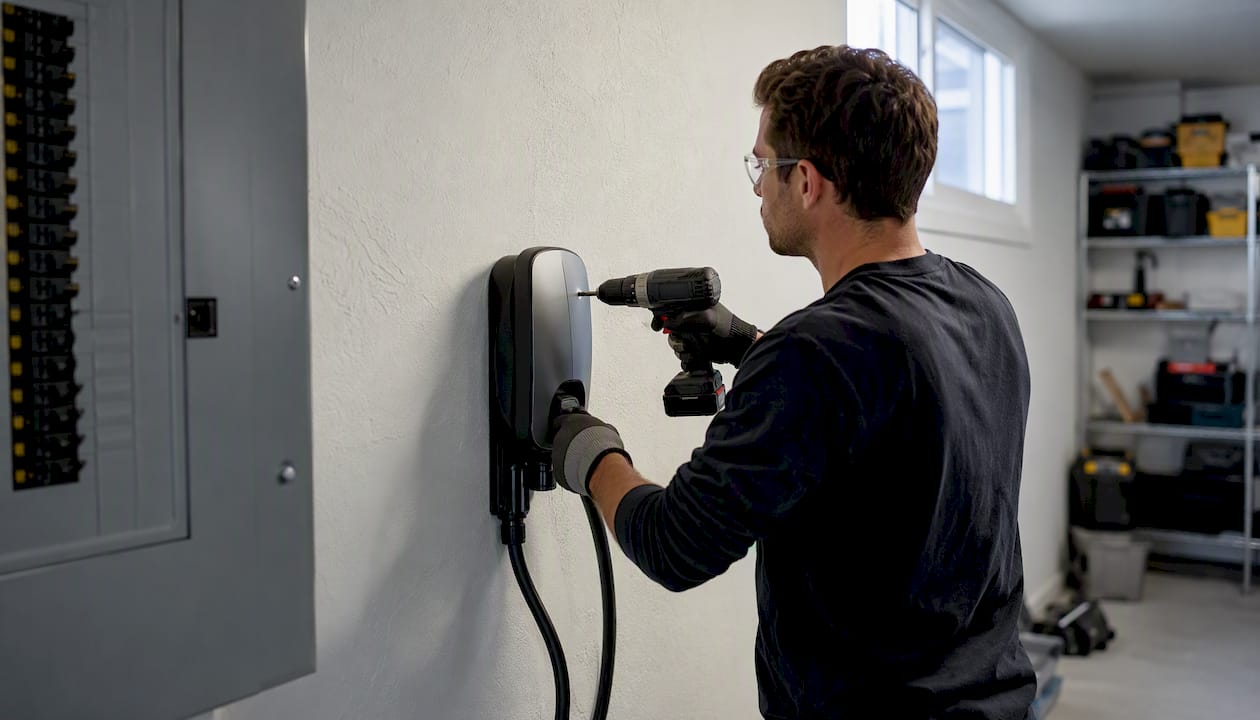
For most Canadian homes, the best place for a Level 2 EV charger is the garage wall closest to where you normally park, positioned as near as practical to the main electrical panel. That single decision keeps wiring runs short, holds down installation cost, protects the unit from weather, and puts the cable right where you need it every evening. If you have no garage, a protected outdoor wall near the panel is the next best option, and a driveway or carport mount works when neither of those is available.
Here is where to start:
-
Garage interior wall: best all-round choice for weather protection, cable management, and short conduit runs
-
Near the garage door (outdoor-rated unit): good if you regularly charge in the driveway or want flexibility
-
Protected outdoor wall: solid option when the panel is on an exterior wall and there is no garage
-
Driveway or carport: workable with weatherproof hardware and careful cable routing
Natural Resources Canada provides national guidance on residential charger installation, covering indoor versus outdoor considerations and Canadian electrical safety requirements. The AFDC / Joint Office site-selection checklist adds useful siting criteria around panel proximity, flood risk, and utility coordination. Evchargerinstallationtoronto’s team at EV Install Pro applies these principles daily across the Greater Toronto Area.
Key takeaways
The single most important placement decision is keeping the charger close to your electrical panel. Every additional metre of conduit adds cost and complexity that a better location choice eliminates.
| Point | Details |
|---|---|
| Measure before you plan | Park your car in its usual spot and measure cable reach to each candidate wall before any installer visits. |
| Prioritise panel proximity | Keeping the panel-to-charger run short is the most reliable way to hold down installation cost. |
| Confirm permits and rebates early | An electrical permit is required for a 240 V circuit; most Canadian rebate programmes require an inspected installation. |
| Plan for a second vehicle | Leave adjacent wall space and ask for oversized conduit so a second charger can be added without rework. |
| Evchargerinstallationtoronto | EV Install Pro provides ESA-licensed installation, permit handling, and rebate assistance across the Greater Toronto Area from $1,800. |
Table of Contents
- What does good EV charger placement actually look like?
- Garage, driveway, or side of house: which location suits you?
- How does panel distance drive your installation cost?
- How do you keep cables safe and out of the way?
- What permits, codes, and rebates apply in Canada?
- How do you choose the right installer for the job?
- How do you future-proof your charger location?
- Accessibility considerations for users with disabilities
- What installers see homeowners get wrong most often
- EV Install Pro handles the full installation for GTA homeowners
- Official resources and useful links for Canadian homeowners
- Sources
What does good EV charger placement actually look like?
A solid placement decision comes down to six measurable factors. Run through this list while standing at your car in its usual parking spot.
- Cable reach: measure from your likely mount point to your car’s charging port. Qmerit recommends a cable reach of roughly 20–25 ft to cover most port positions without leaving excess cable on the floor.
- Mounting height: 36–48 inches from the floor puts the connector at a comfortable torso height for most adults. Lower mounts (closer to 36 in) also improve accessibility for users with mobility limitations.
- Panel proximity: the shorter the run from your electrical panel to the charger, the lower your installation cost. Prioritise locations that keep this distance short where possible.
- Lateral clearances: leave some clear space on each side of the unit. Avoid door-swing zones and active storage areas.
- Outdoor rating: if any part of the charger is exposed to weather, specify a NEMA 4 or NEMA 4X enclosure. Standard indoor units are not rated for Canadian winters.
- Connectivity: smart chargers need a reliable Wi-Fi or cellular signal at the mount point. Check signal strength before committing to a location.
- Permits and utility notification: an electrical permit is required for a 240 V circuit in virtually every Canadian municipality. Check your local requirements before work begins, and notify your utility if you are adding a large continuous load.
Pro Tip: Park your car in its usual spot, then hold a tape measure from the likely mount point to the charging port. Do this before any installer visits. It takes two minutes and prevents the most common placement mistake.
Garage, driveway, or side of house: which location suits you?
Each of the three common locations has a different cost and convenience profile. The right choice depends on your parking habits, panel location, and how much weather exposure the unit will face.
Garage interior
A garage wall is the default recommendation for good reason. The unit stays dry, cable management is straightforward, and the panel is often on an adjacent or nearby wall. Cold weather does not stiffen the cable the way it does outdoors, and there is no risk of snow burying the connector. For single-EV households with an attached garage, this is almost always the lowest-cost and most convenient option.
Near the garage door
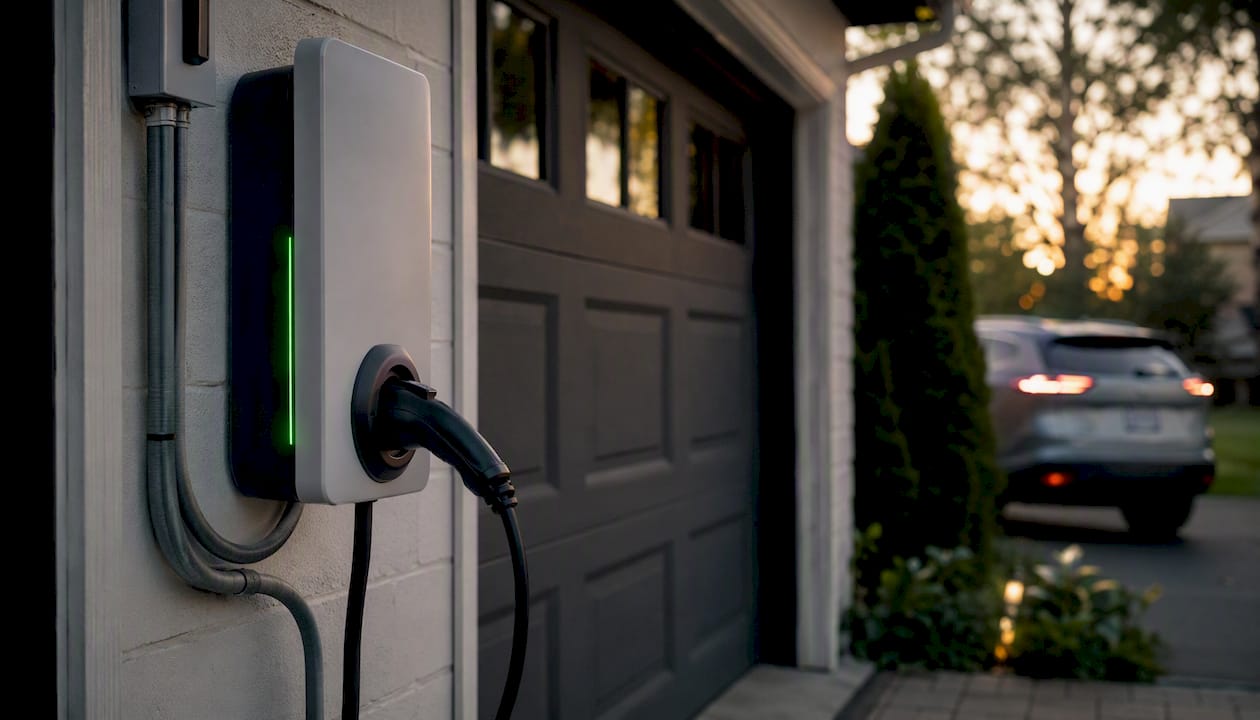
Mounting toward the front of the garage, close to the door opening, gives you the flexibility to charge a car parked inside or one sitting in the driveway. The unit needs to be outdoor-rated if it will be exposed when the door is open. Conduit runs are usually still short, and this position works well for households that regularly park two vehicles and want to reach both. Qmerit notes this as a practical compromise many homeowners prefer.
Driveway or carport
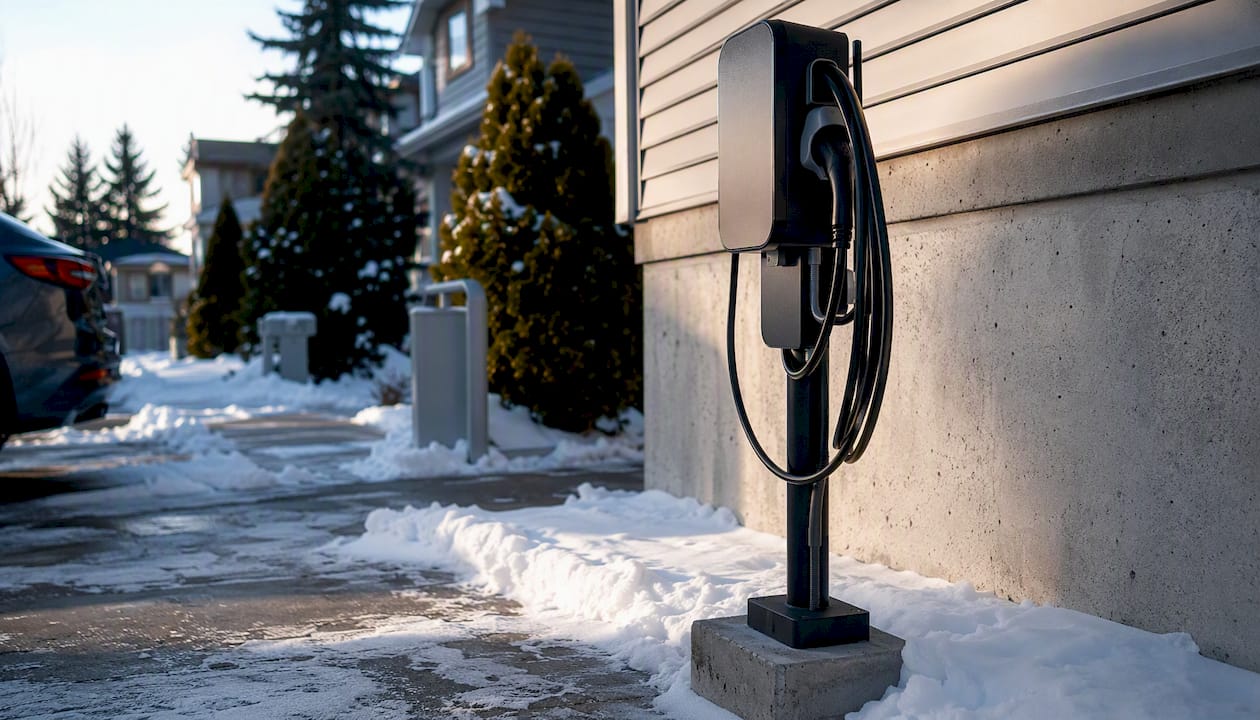
No garage? A weatherproof pedestal or wall mount on the house exterior is the next option. You will need a NEMA 4/4X-rated unit and a canopy or overhang to reduce direct exposure. Cable routing matters here: the cord must not cross a sidewalk or pedestrian path, and in Toronto winters, a cable lying on a driveway can freeze to the surface. A pedestal mount positions the unit at the right height without relying on a wall, which is useful when the nearest wall is too far from the parking spot.
Side of house
When the electrical panel or meter is on a side wall, mounting the charger there can cut conduit runs significantly. Watch for local code setbacks from property lines, neighbour sightlines, and whether the cable routing to the parking spot will cross a walkway. Trenching may be needed if the parking is not adjacent.
| Location | Convenience | Weather protection | Wiring complexity | Cost tendency | Best for |
|---|---|---|---|---|---|
| Garage interior | High | Excellent | Low | Lower | Single or dual EV, attached garage |
| Near garage door | High | Good (if rated) | Low | Lower | Households needing driveway flexibility |
| Driveway / carport | Moderate | Moderate | Moderate | Moderate | No-garage homes |
| Side of house | Moderate | Good | Moderate to high | Moderate | Panel on exterior wall |
Before finalising a driveway or carport location, check whether your garage door layout needs adjustment. If you are planning to reconfigure storage or door hardware to free up wall space, Valiant’s instant garage estimate can help you scope that work alongside your charger install.
How does panel distance drive your installation cost?
Panel-to-charger distance is the single biggest variable in a home EV charger installation budget. Every additional metre of conduit means more materials, more labour, and potentially more finished-wall disruption.
- Short run (under 20 ft, panel nearby): straightforward install, minimal conduit, lowest labour cost. This is the scenario where a basic Level 2 installation stays in the lower end of the cost range.
- Moderate run (20–50 ft, basement panel with a simple route): still manageable, but conduit length and any drywall penetrations add time and cost.
- Long run (50+ ft, opposite end of house or detached garage): expect trenching, conduit through finished spaces, or a subpanel near the parking area. Costs rise meaningfully, and project timelines extend.
- Service upgrade trigger: homes on a 100 A service that also run electric heat, a hot tub, or other large loads may need a 200 A panel upgrade before a 48 A charger can be added safely.
Cost note: EV Charger Scout’s installation guide confirms that straightforward Level 2 installs typically run into the low thousands of dollars, with permits, panel distance, and any required upgrades as the main cost drivers. Canadian rebates can offset a portion of that cost when the work is permitted and inspected.
Smart load management, specifically an EVEMS (Electric Vehicle Energy Management System) or a load-sharing device like the DCC-12, is often a lower-cost path than a full service upgrade. EVEMS installation lets you add a charger to a 100 A panel by dynamically sharing available capacity, avoiding the cost and utility coordination of a full service upgrade.
How do you keep cables safe and out of the way?
Cable management is where placement decisions become daily-use decisions. A charger mounted in the right spot but with no plan for the cable creates trip hazards, connector wear, and frustration.
- Cable length: a 20–25 ft cable reaches most port positions without leaving excess cord on the floor. Longer cables are harder to store and more likely to be driven over.
- Holsters and retractors: a simple cable holster mounted beside the unit keeps the connector off the ground when not in use. Overhead cable retractors work well in garages with high ceilings, keeping the full cable length off the floor entirely.
- Bumper clearance: mount the unit at least 18 inches horizontally from where your bumper stops. A vehicle strike on a charger is expensive and avoidable.
- Outdoor protection: in exposed locations, a bollard or guard post in front of the unit prevents accidental vehicle contact. A canopy or overhang reduces UV degradation and ice formation on the connector.
- Cold-weather cable stiffness: in Canadian winters, EV cables stiffen noticeably below -10°C. A mount that keeps the cable short and off the ground reduces the effort of plugging in on a cold morning.
- Safety clearances: do not mount within 3 ft of a fuel storage area, sprinkler head, or water source. Keep the unit clear of any overhead drip points from eaves or gutters.
Pro Tip: If your garage has a high ceiling, an overhead cable reel is the cleanest solution. The cable hangs straight down to the port, never touches the floor, and retracts automatically. It costs more upfront but eliminates the daily cable-coiling habit.
For hardware guidance on cable lengths and recommended unit ratings, the best home EV chargers guide covers current options available in Canada.
What permits, codes, and rebates apply in Canada?
Permits and rebates are not paperwork details to sort out after you pick a location. They can directly affect which mounting point makes financial sense.
- Electrical permit: a 240 V Level 2 circuit requires an electrical permit in virtually every Canadian municipality. The permit triggers an inspection, which is also a condition for most rebate programmes. EV Charger Scout confirms that many rebate programmes and incentives require a completed, inspected installation before payment is issued.
- ESA permit in Ontario: in Ontario, the Electrical Safety Authority (ESA) administers electrical permits. Your installer must be ESA-licensed and pull the permit on your behalf. Details on ESA permit requirements are available for Ontario homeowners.
- Natural Resources Canada guidance: Natural Resources Canada provides national guidance on residential charger installation, including indoor versus outdoor safety considerations and electrical requirements applicable across provinces.
- Rebates and incentives: Ontario and many utilities offer rebates on home EV charger installations. The EV charger rebates page lists current Ontario incentives and York Region programmes. Rebate values can reach up to $5,000 for qualifying new EV purchases, but eligibility typically requires a permitted, inspected installation.
- Utility notification: if you are adding a 40 A or 48 A charger, notify your utility before installation. Some utilities require a load-connection notification for large continuous loads, and Toronto Hydro has specific requirements for service upgrades.
- HOA and zoning: if you live in a condo, townhouse complex, or neighbourhood with a homeowner association, check the rules before committing to an outdoor mount. Some HOAs restrict visible exterior hardware or require approval for electrical work on shared structures.
How do you choose the right installer for the job?
The installer you hire will make the final call on mount location during the site visit. Choosing someone qualified means that call will be based on panel proximity, cable routing, and code compliance, not just what is easiest to drill.
- Required credentials: in Ontario, your electrician must be ESA-licensed. Ask for their licence number and verify it. Proof of liability insurance is non-negotiable. An ESA-licensed electrician will also pull the permit and coordinate the inspection.
- Questions to ask: How long is the proposed panel run? Will you handle the permit and rebate paperwork? What is the lead time for inspection? Will you walk the site with me before quoting?
- Red flags: a quote with no mention of permits, an installer who will not do a site walk, or a price that seems too low to cover conduit and inspection fees. Skipping the permit voids most rebates and leaves you with uninspected electrical work.
- What a good site visit looks like: the installer measures the distance from the panel to each candidate mount point, checks Wi-Fi signal for smart charger connectivity, confirms the parking position relative to the charging port, and provides a written quote that itemises conduit, hardware, and any panel work.
Pro Tip: Ask the installer in writing whether the proposed mount location leaves room for a second charger or a subpanel feed. A good installer will answer that question without being asked, but getting it in writing protects you if your household adds a second EV in two years.
How do you future-proof your charger location?
The location you choose today should still make sense when you add a second EV, upgrade to a higher-amperage charger, or install solar. A little planning now avoids a costly rework later.
- Space for a second unit: choose a wall section long enough to accommodate a second charger beside the first. Leave at least 24 inches of clear wall space adjacent to your initial mount.
- Conduit sizing: ask your installer to run conduit one size larger than the current circuit requires. Pulling new wire through existing conduit is far cheaper than running new conduit through finished walls.
- Subpanel option: if your parking is far from the main panel, a subpanel near the garage is often the most cost-effective way to support two chargers and a future panel upgrade without running long individual circuits.
- Smart load management: EVEMS and load-sharing systems let two chargers share a single circuit’s capacity dynamically. This is particularly relevant for 100 A services where a full upgrade is not yet warranted. The AFDC site-selection checklist recommends evaluating future expansion capacity at the siting stage, even for residential projects.
- Solar and battery readiness: if you plan to add solar or a home battery, discuss the charger location with your solar installer before committing. The panel proximity and conduit routing interact with where a battery inverter can be mounted.
Accessibility considerations for users with disabilities
Charger placement affects daily usability for anyone with a mobility limitation, and it is worth addressing before the unit goes on the wall.
Mount height is the most direct factor. A charger at 36 inches from the floor is reachable from a seated position and meets the lower end of the recommended 36–48 inch range. If the primary user is a wheelchair user or has limited reach, 36 inches is the right target, not 48.
Approach clearance matters as much as mount height. Leave at least 36 inches of clear floor space in front of and beside the unit so a wheelchair or mobility aid can position alongside it without obstruction. If the parking spot is tight, consider whether the charger can be offset slightly toward the open side of the stall.
The connector holster should be positioned so the connector can be lifted and inserted with one hand and without bending below waist height. Some cable retractor systems make this easier by holding the connector at a consistent height.
For outdoor installs, a firm, level surface from the vehicle to the charger is necessary. Gravel or uneven pavement creates real barriers. A paved or compacted surface from the parking position to the unit is worth specifying in the project scope.
What installers see homeowners get wrong most often
Most placement mistakes come from one of three sources: choosing a spot that looks tidy rather than one that is practical, not measuring the cable reach before the installer arrives, or skipping the permit step to save time.
The tidiest wall in your garage is rarely the closest to your panel. Homeowners often pick a back corner because it keeps the charger out of sight, then discover the conduit run adds several hundred dollars to the quote. The fix is simple: before the installer visits, identify where your panel is and which wall is closest to it. That wall is your starting point, not your finishing point.
Measuring cable reach is a two-minute task that prevents a surprisingly common problem. If your car’s charging port is on the driver’s side rear quarter and you park nose-in, the charger needs to be on the driver’s side wall, not the passenger side. Getting this wrong means either a cable that barely reaches or one that drapes across the front of the car.
Permit delays are the most frequent source of project frustration. Homeowners who want to move fast sometimes ask installers to skip the permit. That saves a few days upfront and costs weeks or months if a rebate application is later rejected for lack of an inspection record. Book the permit at the same time you book the installation.
EV Install Pro handles the full installation for GTA homeowners
Getting the placement right is the first step. Getting it installed correctly, permitted, and rebate-eligible is where EV Install Pro delivers real value for homeowners across the Greater Toronto Area.
Evchargerinstallationtoronto’s team of ESA-licensed electricians starts with an on-site assessment, measures your panel run, confirms your parking position, and recommends the optimal mount location before any work begins. Permits and inspections are handled at no extra charge, and the team manages rebate applications worth up to $5,000 for qualifying installations. Pricing starts at $1,800, same-week booking is available, and most installations are completed within a few hours. The service holds a 4.9 customer rating across completed GTA installations.
Use the free installation cost calculator to get an instant estimate based on your panel distance and charger type, or check the live charger map to see completed installations near you. To book a site visit, visit Evchargerinstallationtoronto.
Official resources and useful links for Canadian homeowners
These sources are worth bookmarking before you finalise your placement decision or begin the permit process.
Natural Resources Canada — Charger Installation Guidance Natural Resources Canada’s charger installation page covers indoor versus outdoor installation considerations, safety requirements, and electrical guidance applicable to all Canadian provinces. It is the primary national reference for residential EV charger installation.
AFDC / Joint Office Site-Selection Checklist The AFDC site-selection checklist is a US federal technical resource, but its siting criteria around panel proximity, flood risk, accessibility, and utility coordination apply directly to residential placement decisions. Use it as a structured thinking tool alongside Canadian code requirements.
Ontario Rebates and Incentives The EV charger rebates page lists current Ontario and utility incentives, including York Region programmes available through EV Charger Rebates York Region. Rebate eligibility generally requires a permitted and inspected installation.
ESA Permit Requirements (Ontario) The ESA permit guide explains what Ontario homeowners need to know about electrical permits for EV charger installations, including who pulls the permit and what the inspection covers.
Utility Contact Contact Toronto Hydro or your local utility before installation if you are planning a 40 A or 48 A charger or a service upgrade. Utility notification requirements vary by provider and load size.
Sources
- Electric vehicle charging – Charger installation
- Site selection process for EV charging stations (AFDC / Joint Office technical assistance help sheet)
- Home EV Charger Installation Guide: Wiring, Permits, and Cost in 2026 | EV Charger Scout
Recommended
- Best home EV chargers in Canada: 2026 Toronto guide | EV Install Pro Toronto
- EV Charger Installation in a Toronto Condo or Apartment: The Complete 2025 Guide | EV Install Pro Toronto
- EV Charger Guides & Blog | EV Install Pro Toronto | EV Install Pro Toronto
- EV Charger Installation Cost in Toronto 2025: Complete Pricing Guide | EV Install Pro Toronto
Get Your Free Installation Quote
Free assessment · ESA permit included · Same-week availability across the GTA