Tesla home charging Canada: the 2026 homeowner’s guide
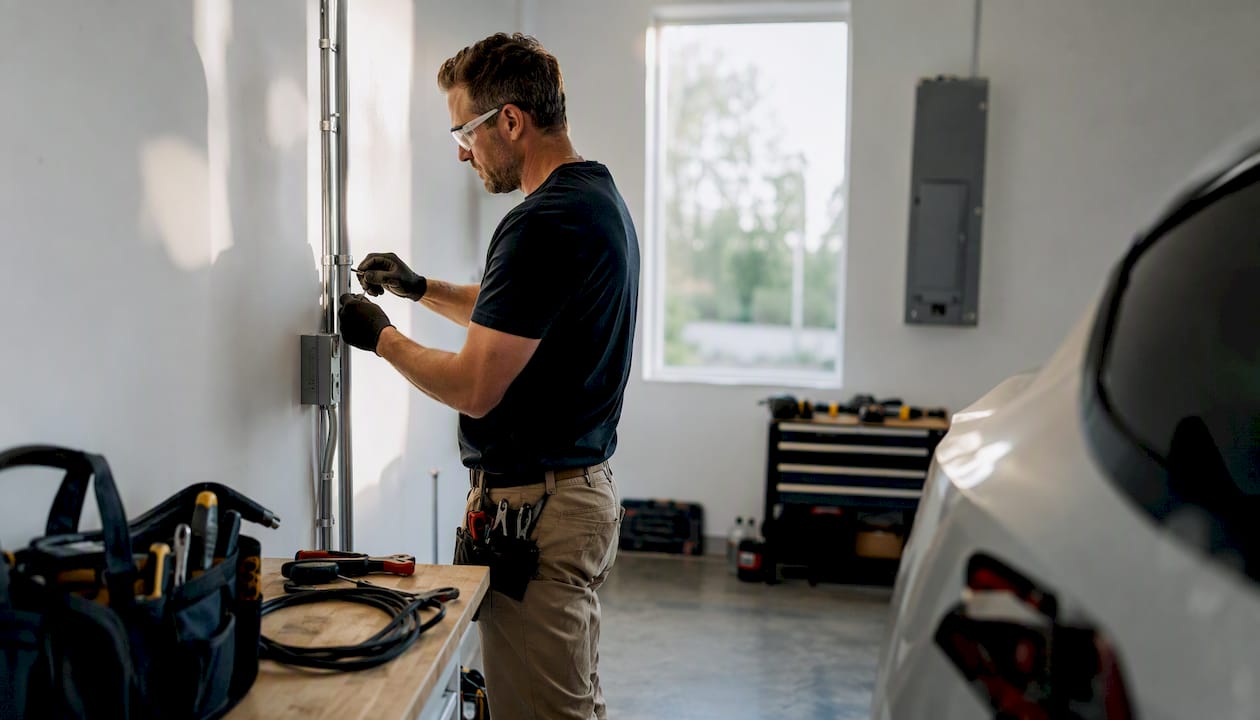
For most Canadian Tesla owners, the Tesla Wall Connector (Universal Wall Connector) is the right long-term home charging choice. It adds up to about 71 kilometres of range per hour, it works with power management features that can help you avoid a panel upgrade, and it typically qualifies for provincial or utility rebates that lower your net cost.
A full installation, including a licensed electrician and permit, usually lands somewhere between $1,100 and $2,500+ depending on your panel’s condition and how far your parking spot sits from your electrical panel. That range moves higher if your home needs a service upgrade. Here’s what to do next:
- Get 2 to 3 written quotes from ESA-licensed electricians before committing to any installer.
- Check your provincial and utility rebate pages before your install date, since some programs require pre-approval.
- If you want the permit, rebate paperwork and installation handled for you, request a local quote from EV Install Pro.
Key takeaways
The Tesla Wall Connector delivers the fastest practical home charging speed in Canada, and pairing it with load management and available rebates keeps installation costs manageable for most homeowners.
| Point | Details |
|---|---|
| Choose the right hardware | The Wall Connector suits daily commuters; a Mobile Connector with NEMA 14-50 works for lighter drivers on a budget. |
| Budget realistically | Expect $1,100 to $2,500+ depending on panel condition and cable run distance to your parking spot. |
| Confirm permits and licensing | Only hire ESA-licensed (or provincial equivalent) electricians and keep every permit and inspection document. |
| Explore power management first | Dynamic power management can avoid a costly panel upgrade in many homes. |
| Let a full-service installer handle it | EV Install Pro manages permits, rebates up to $5,000, and commissioning, with installs often finished within a few hours. |
Table of Contents
- Wall Connector vs mobile connector vs NEMA 14-50: which fits your home?
- How fast does each option charge, and what does it cost per night?
- Do you need a panel upgrade for a Tesla charger?
- What permits and licences does a Tesla charger installation need?
- What does a Tesla charger installation cost in Canada, and what rebates exist?
- How do you set up and get the most from Tesla’s charging features?
- What mistakes and safety issues should you watch for?
- How does a certified installer handle a Tesla charger project?
- What do installers actually see on a typical job?
- If you’d rather not manage this yourself, here’s what EV Install Pro handles
- Where to verify these details yourself
- Frequently asked questions
- Sources
Wall Connector vs mobile connector vs NEMA 14-50: which fits your home?
The three main paths to home charging a Tesla in Canada differ mainly in speed, upfront cost, and how much of your home’s electrical system they touch. A renter in a condo with a shared garage has very different needs than a homeowner with a detached garage 25 metres from the panel.
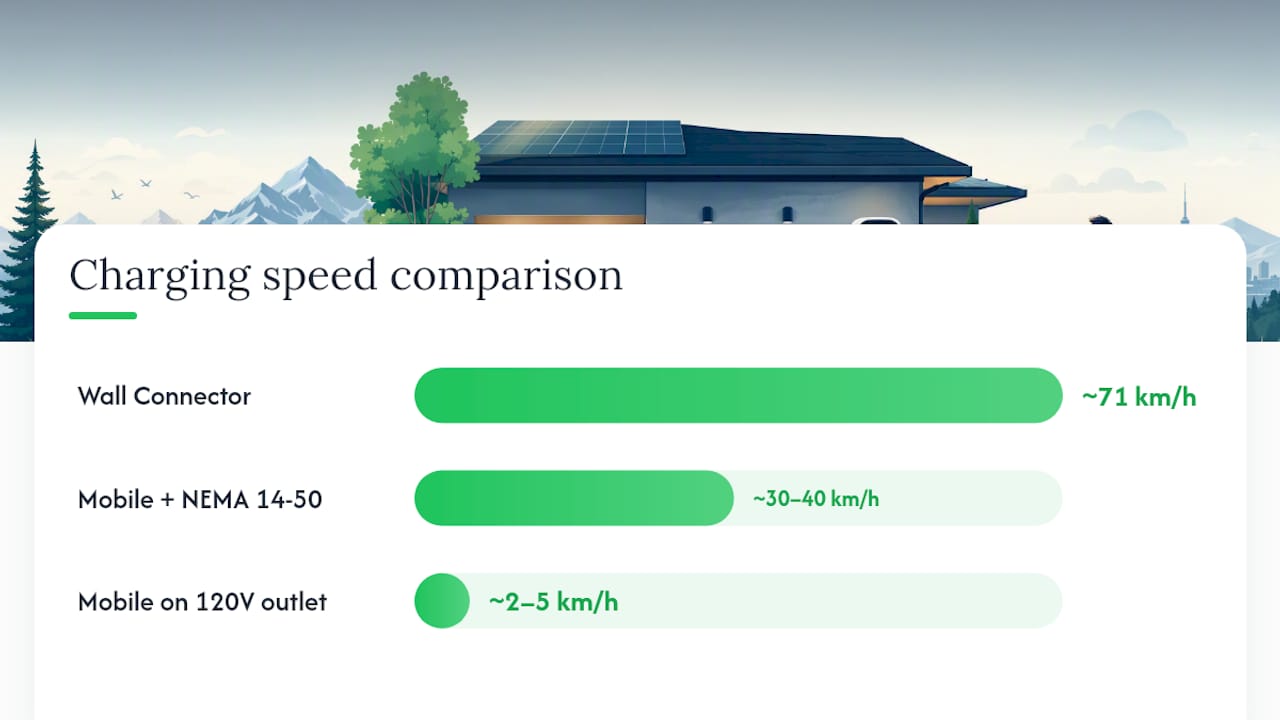
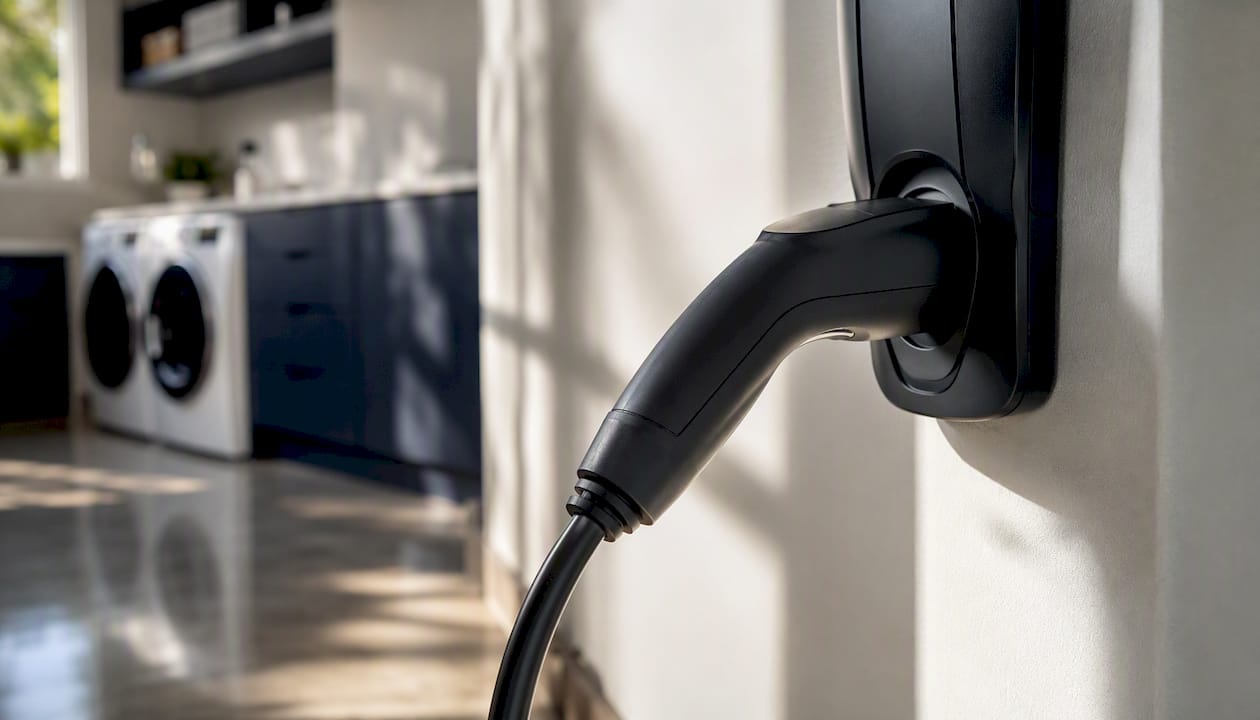
The Tesla Wall Connector is a hardwired unit that draws up to 48 amps on a 240V circuit, delivers close to 11.5 kW, and connects to Wi-Fi for over-the-air updates and app-based scheduling. It supports static, dynamic, and group power sharing, which matters if you’re charging more than one EV or trying to stay under your panel’s amperage. The Tesla Mobile Connector plugs into a standard outlet and is meant as a backup or travel solution rather than a primary daily charger, though pairing it with a NEMA 14-50 receptacle turns it into a reasonably fast Level 2 option for a fraction of the Wall Connector’s install cost.
| Charging option | Speed (km added/hour) | Typical install cost (CAD) | Power required | Best for | Complexity/permits |
|---|---|---|---|---|---|
| Tesla Wall Connector | Up to ~71 km/h | $1,100–$2,500+ | 240V, up to 48A | Homeowners, daily commuters | Electrician + permit required |
| Mobile Connector + NEMA 14-50 | ~30–40 km/h | $400–$900 | 240V, 30–50A | Homeowners wanting a lower-cost setup | Electrician + permit required |
| Mobile Connector on 120V outlet | ~2–5 km/h | $0 (existing outlet) | 120V, 15A | Renters, occasional top-ups | None, but slow overnight gains |
A few quick scenarios make this easier to picture:
- Condo or apartment renter: a 120V outlet with the Mobile Connector is often the only option available without strata or landlord approval, and it’s fine for owners who drive under 40 kilometres a day.
- Single-family homeowner: the Wall Connector is the practical choice if you want a full overnight top-up regardless of how much you drove that day.
- Multi-EV household: two or more Wall Connectors set up in group power-sharing mode split available amperage automatically, so you don’t need two separate high-capacity circuits.
How fast does each option charge, and what does it cost per night?
The gap between these options is larger than most new owners expect. Tesla’s own figures show the Wall Connector adding up to 71 kilometres of range per hour, while a standard 120V Mobile Connector adds only a few kilometres per hour on a regular household outlet. That’s the difference between a full charge overnight and needing three or four nights to recover the same range.
Statistic to remember: a Wall Connector can add roughly 14 to 35 times more range per hour than a 120V trickle charge, depending on your Tesla model’s onboard charger limit.
To estimate what a night of charging actually costs, multiply the kilowatt-hours you’re adding by your local off-peak electricity rate. If your Model 3 needs 40 kWh to refill and your utility’s off-peak rate is around $0.087/kWh in Ontario, you’re looking at roughly $3.50 for a full charge, a fraction of what the same range would cost from a Supercharger. Drive Tesla Canada notes that roughly 90% of Tesla charging happens at home for exactly this reason: it’s cheaper, it happens while you sleep, and it doesn’t require a detour.
A few practical notes on real-world speed:
- Your car’s onboard charger caps the maximum rate it can accept, so a Wall Connector rated for 48A won’t help if your vehicle only accepts 32A.
- Cold Canadian winters slightly reduce charging efficiency, so budget a little extra time on the coldest nights.
- Scheduled off-peak charging through the Tesla app is the single easiest way to cut your per-night cost without changing hardware.
Do you need a panel upgrade for a Tesla charger?
Most Wall Connector installations run on a 240V circuit with a 40 to 60 amp breaker, sized to support the connector’s 48A maximum draw. Whether your home can handle that without further work comes down almost entirely to your existing panel.
Older homes with 100A electrical service are the most common trigger for a costly upgrade. If your panel is already running close to capacity with a furnace, dryer, and central air conditioning, adding a 48A circuit can push it over its rated limit, forcing a jump to 200A service. That upgrade alone can add several thousand dollars to a project, according to EVQuotes’ Canadian pricing data.
The good news is that a full panel upgrade isn’t always necessary. Load management technologies let you install a Wall Connector on a tighter panel by throttling its output in real time.
- Static power management sets a fixed maximum amperage for the Wall Connector and never adjusts it.
- Dynamic power management actively monitors your home’s total electrical draw and throttles the charger up or down, but Tesla requires an approved power meter sold separately to enable this.
- Group power sharing splits available amperage across multiple Wall Connectors so two EVs can charge from one circuit without exceeding your panel’s rating.
Pro Tip: Ask your electrician to calculate your home’s existing load before you commit to a specific charger amperage. A dynamic power management setup, like the EVEMS installations EV Install Pro offers, often costs less than a full 200A panel upgrade and gets your charger running just as fast most nights.
What permits and licences does a Tesla charger installation need?
Every Canadian province requires an electrical permit for a new 240V circuit, and skipping that step isn’t just a legal grey area, it can put your home insurance at risk. In Ontario, that means an ESA-licensed electrician pulls the permit and the Electrical Safety Authority inspects the finished work before it’s considered code-compliant. Other provinces run similar systems through their own safety authorities, so confirm the local requirement before work begins.
Before you sign a contract, ask your electrician these questions:
- Are you licensed in this province, and can you provide your licence number?
- Do you carry liability insurance, and is it current?
- Is the permit fee included in your quote, or billed separately?
- Will you handle the inspection and provide the certificate afterward?
- Do you commission the Wall Connector in the Tesla app, including Wi-Fi setup and firmware updates?
- What warranty do you provide on the labour, separate from Tesla’s hardware warranty?
A properly commissioned Wall Connector needs a working Wi-Fi connection so it can receive firmware updates and so the Tesla app can confirm it’s operating correctly, a step detailed in Tesla’s own Gen 3 installation manual. Skipping commissioning doesn’t just leave a feature unused, it can leave you without proof the unit was installed correctly if you ever need to file an insurance claim.
- Get written quotes from at least two or three electricians before choosing one.
- Confirm the permit and inspection fees are itemized, not bundled vaguely into “installation.”
- Save every document: the permit receipt, the inspection certificate, and the commissioning log.
What does a Tesla charger installation cost in Canada, and what rebates exist?
Cost depends almost entirely on how much electrical work your home needs beyond the charger itself. EVQuotes’ Canadian installer data breaks this into three realistic tiers.
| Install scenario | Typical cost range (CAD) | What drives the price |
|---|---|---|
| Basic (panel ready, short cable run) | a few hundred to around one thousand dollars | Existing capacity, garage near the panel |
| Moderate (longer run, some panel work) | around one to one and a half thousand dollars | Cable distance, minor panel adjustments |
| Complex (trenching, detached garage, or panel upgrade) | two and a half thousand dollars or more | Service upgrade, underground conduit, permit complexity |
Rebates can meaningfully shrink these numbers. Natural Resources Canada notes that home charging is the most convenient and least costly way to charge an EV, and that some provincial programs may cover a significant share of installation costs, though availability changes by province and sometimes by utility territory. A handful of things to keep in mind:
- Some rebates require pre-approval before you start work, not after the invoice arrives.
- Rebate structures vary: some pay a flat amount, others cover a percentage of the total install cost up to a cap.
- Utility-specific programs sometimes stack with provincial ones, but only if you apply for both in the right order.
Because rules shift year to year, confirm current terms with your utility or through Natural Resources Canada before assuming a specific dollar figure applies to your home. If you’d rather not track down every program yourself, EV Install Pro’s rebate page walks through what’s currently available in Ontario.
How do you set up and get the most from Tesla’s charging features?
Commissioning a Wall Connector is more than bolting it to the wall. After the electrician finishes the physical install, the unit needs to join your home Wi-Fi network so it can receive firmware updates and stay connected to the Tesla app. Once it’s online, you can set scheduled departure times, charge limits, and monitor usage remotely.
Three features are worth configuring immediately:
- Scheduled departure and off-peak charging: set your car to begin charging after midnight or whenever your utility’s cheapest rate window opens, rather than the moment you plug in.
- Winter preconditioning: schedule your cabin and battery to warm up while still plugged in, which uses grid power instead of draining the battery before your drive.
- Power sharing mode: if you’re running dynamic power management, confirm the Tesla-approved power meter is installed and reporting correctly, since this is what lets the Wall Connector safely flex its output based on your home’s real-time load.
Pro Tip: If your home has rooftop solar or battery storage, ask your electrician whether your inverter setup can talk to the Wall Connector’s scheduling. Charging during solar production hours instead of overnight off-peak can push your per-kilometre cost even lower on sunny days.
What mistakes and safety issues should you watch for?
The most expensive mistakes on a Tesla charger install almost always trace back to skipped steps, not bad hardware. A handful of patterns come up again and again:
- Hiring an unlicensed installer to save money upfront, which risks a failed inspection or a voided home insurance claim later.
- Skipping the permit entirely, assuming a “small” electrical job doesn’t need one.
- Underestimating cable run distance, which turns a basic install into a moderate one once the invoice arrives.
- Ignoring panel capacity and finding out mid-install that a $400 job is now a $4,000 one.
- Forgetting to commission the Wall Connector in the Tesla app, leaving scheduling and firmware updates unavailable.
Installer practice across the industry is consistent on one point: get multiple quotes, confirm licences and permit handling upfront, and never skip the paperwork. Skipping permits risks having an insurance claim denied after an incident, even if the wiring itself was done correctly.
Tesla’s Wall Connector warranty generally covers manufacturing defects for residential use, but installing it in a commercial or multi-unit rental setting can change those terms, so confirm your use case with the seller before assuming full coverage applies. Canadian winters add their own wrinkle: outdoor-mounted connectors need weatherproof enclosures rated for the temperature swings your region sees, and any exposed conduit should be inspected before the first hard freeze. Keep your inspection certificate somewhere accessible. If a wiring issue ever causes damage, that document is often what separates a smooth insurance claim from a denied one.
How does a certified installer handle a Tesla charger project?
A full-service installer follows a fairly consistent sequence, and knowing it in advance helps you spot a company that’s cutting corners. The process typically runs: a site assessment to check panel capacity and cable distance, a written quote, permit submission, the physical installation, and finally commissioning and inspection sign-off.
EV Install Pro’s approach in the Greater Toronto Area reflects that full sequence. Their electricians are ESA-licensed, they handle permit submission and rebate applications worth up to $5,000 for new EV purchases as part of the service, and most straightforward jobs are completed within a few hours on-site. Customer feedback puts them at a 4.9 rating, and pricing starts from $1,800 for a managed, end-to-end install.
What separates a full-service job from a bargain one is the paperwork you’re left with afterward:
- A permit receipt showing the work was registered with your provincial safety authority.
- An inspection certificate confirming the installation passed code.
- A commissioning log showing the Wall Connector was properly connected to Wi-Fi and configured in the Tesla app.
Keep all three. They’re what an insurer or a future buyer will ask for if your home’s electrical work ever comes into question.
What do installers actually see on a typical job?
Technicians who install Wall Connectors every week will tell you the quote almost never surprises them, the site visit does. A straightforward garage install with the panel five metres away can be wrapped up in two to three hours. The jobs that run long and cost more almost always involve one of three things: a detached garage requiring trenched conduit, a panel that’s already maxed out on capacity, or an older home where the main service itself needs replacing before anything else can happen.
The quick wins are just as predictable. Homes built in the last 15 years usually have 200A service already, which means the electrician’s main job is running the circuit and mounting the unit, not touching the panel at all. Proper commissioning matters more than most owners assume going in. A Wall Connector that’s bolted up but never connected to Wi-Fi won’t receive firmware updates, and troubleshooting a charging issue six months later becomes far harder without that connection already established. Getting it right the first time, including the paperwork, is what saves owners a callback later.
If you’d rather not manage this yourself, here’s what EV Install Pro handles
Everything covered above, the permits, the rebate applications, the panel assessment, the commissioning, is exactly what EV Install Pro manages on your behalf across the Greater Toronto Area. Instead of coordinating an electrician, a permit office, and a rebate application separately, you get one company handling the whole sequence from quote to inspection sign-off.
Their ESA-licensed electricians handle rebate applications worth up to $5,000 for new EV purchases, manage all permits and inspections at no extra charge, and typically complete installations within a few hours thanks to same-week booking availability. If your project includes interior wall work to route cable to a detached garage, that kind of coordination sometimes overlaps with other trades, and partners like La Rocks Renovations handle framing and insulation work when a charger install intersects with a basement or garage renovation.
If your panel is already close to capacity, ask about their EVEMS smart load management installs, which can avoid a full service upgrade in many Toronto homes. The fastest way to get a real number for your specific home is to run it through the free cost calculator and request a quote directly.
Where to verify these details yourself
Rebate rules, provincial permit requirements, and hardware specs all change over time, so it’s worth bookmarking a few primary sources before your install date.
- Natural Resources Canada’s EV charging page for federal guidance and links to provincial programs.
- Tesla’s Gen 3 Wall Connector installation manual for technical wiring and commissioning details.
- EV Install Pro’s rebate page for current Ontario-specific rebate guidance.
Always cross-check rebate amounts and pre-approval conditions with your provincial energy provider or utility before finalizing your install, since program terms can shift between application windows.
Frequently asked questions
Is a Tesla Wall Connector required, or can I use the Mobile Connector permanently? You can use the Mobile Connector permanently on a NEMA 14-50 outlet, but plan on roughly half the charging speed of a Wall Connector. For daily driving, most Canadian owners find the Wall Connector’s faster overnight recovery worth the extra upfront cost.
How long does a typical Tesla home charger installation take in Canada? Straightforward jobs where the panel already has capacity often finish within a few hours. Installations needing trenching, panel upgrades, or a detached garage run can take a full day or longer, plus scheduling time for permit approval and inspection.
Do I need a permit even for a simple NEMA 14-50 installation? Yes. Any new 240V circuit requires an electrical permit in Canada, regardless of whether you’re installing a Wall Connector or a standard outlet for the Mobile Connector.
Can I avoid a panel upgrade if my home has 100A service? Sometimes. Dynamic power management with a Tesla-approved power meter can throttle your charger’s output based on real-time household load, which lets many 100A homes install a Wall Connector without upgrading to 200A service.
Are there rebates specifically for home Tesla charging in Canada? Provincial and utility rebate programs vary and change periodically, with some covering a portion of installation costs. Check Natural Resources Canada’s resources and your local utility before you install, since some programs require pre-approval.
Sources
- Electric vehicle charging – Charger installation - Natural Resources Canada
- Complete Tesla Home Charging Guide for Canadian Homes (2026) - Drive Tesla
Recommended
- Best home EV chargers in Canada: 2026 Toronto guide | EV Install Pro Toronto
- Tesla charger installation cost: 2026 guide for Toronto homeowners | EV Install Pro Toronto
- EV Charger Guides & Blog | EV Install Pro Toronto | EV Install Pro Toronto
- Outdoor EV charger enclosure: Toronto homeowner’s guide | EV Install Pro Toronto
Get Your Free Installation Quote
Free assessment · ESA permit included · Same-week availability across the GTA